
1st update
Description on the individual ideation of the link
Objective of the link
This link is created so that people can know more about the clothing of Baba Nyonya culture and to provide sufficient information to the users so that they can understand their clothing culture easily. Besides, it is also to promote the Baba Nyonya clothing so that can attract people can travel to visit and experience the culture of Baba Nyonya.
Design of GUI

On the top will be the banner for the site and below there are several links that shows different clothing of the Baba Nyonya culture. User can click into it and obtain information of that particular link by transferring to another page. Alternatively, there are links attached with pictures so that users can understand easily of what they want to search for. On the left will be the side bar that will link to the homepage of the whole website and link to other aspects of the Baba Nyonya culture.

This will be the interface of the links that the user clicks into. On the top will be the link banner and right at the bottom of the banner will be the links that will link to gallery that consists of pictures and probably some link to some videos. The left sidebar will be maintain so that the user can easily access to other site. Picture and information and the description will be provided on the right box.
Flowchart of the individual site

The main one will be clothing and then comes down to four links which is ‘sarung kebaya’, ‘long blouse’, ‘beaded slippers’ and ‘wedding’. Below all of the sub links, there will be too more links for each of the sub links which is ‘gallery’ and ‘links’.
References
http://nyonyaandbaba.blogspot.com/2009/07/clothing-of-baba-and-nyonya.html
2nd post
Before I start with the website, I have to design the banner and have to edit some pictures to put inside the website. Since I have already designed the GUI of the website, I roughly know what I have to design and how I want to place it inside the website. I used Adobe Photoshop to design and edit all my pictures. Below are the banners and pictures that I had edited for the website. I kind of play around with the opacity of the image and I also used tools like magnetic lasso tool to cut certain pictures to place on other pictures. Besides, I also mess around with the layer style of each element. Some I add an outer glow, some I add stoke to make it looks nicer and some change the contour and texture of the image or word. I also used a type tool to type in the words that I want. Let me show you one example.


First of all, I selected a background that I want and change the opacity of the image and change the color balance as well.

After that by using the typing tool, I key in the words that I want. Under layer style, I change the contour and texture of the word. Select a color, add stoke to make the words feel like are all covered and I added outer glow for the word.

Lastly, I add the image of the kebayas and beaded slippers which I cut it out using magnetic lasso tool and add a white stock for them so that they look strike out a little bit from the background.

And finally, this is the main page banner of my website

This 4-in-1 picture is designed for the user to navigate themselves to other links of the website


This is the banner for the Sarong Kebaya link

This is the banner for the Long Blouse

This is the banner for Beaded Slippers
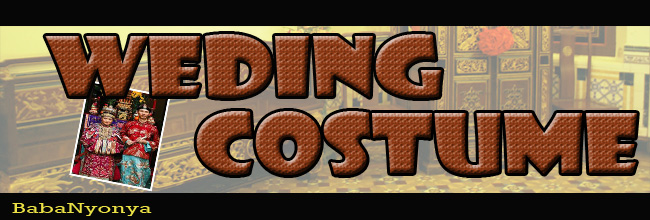
And lastly, this is the banner for Wedding Costume
I designed all the banners in the same pattern so that I can show unity in my whole website. Anyway, it must also work together with the correct background so that the whole website will looks unite.


This is the background that I will use in my website
I picked this background because I want to make the website looks like a home of Baba Nyonya style. I edited the picture using Adobe Photoshop and make it like a reflection on the bottom so that the background will feels connected when you place the background in the website and repeated it. After having all the pictures, background and banners that I want to use, now is the time to start with my website.
3rd post
To create a website, Adobe Dreamweaver is used. Initially, I start off doing the website by following the GUI that I had designed earlier on. I place the tables just like the way I did in the GUI. After that I placed all the banners and pictures inside as well as the background.
This is the initial design of my website

This is how the main page of my website looks like after placing in all the things.
I am pretty satisfy with what i had done because the actual website turns out almost the same as what I initially designed and want it to looks like. Part one completed, now is the time to work on the other links in the website.
4th post
To start with the links, new files were created and named accordingly. After that link the main page with the links together so that the user can navigate themselves easily to the other page. I have four links which is Sarong Kebaya, Long Blouse, Beaded Slippers and Wedding Costume. After I created the files, I create a template using the main page so that I can use it in all the link pages and this can save a lot of time. I used the template for all of the link pages and I changed the banner of the page according to the title of the page and add in the information for the user to view.


There are some of the example of how my link page looks like...
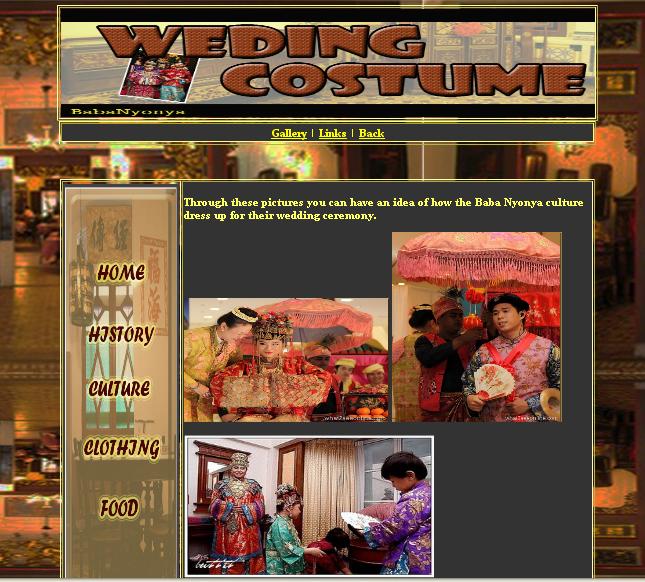
Under the banner, you can see that there are still other links which are the gallery, video links and back button. So new files were created for each of the sub links to create the gallery and video link page. Same thing, template were used for the design of the page. This is how the links pages look like. After that I will work on the gallery of each links and the videos for it.
5th post
This is the final touch of the website, completing the gallery and video links than the website is done. First of all I get some pictures for each of the sub topics and find videos related to those topics from Youtube. After everything is done, use the template that has been created and put in those pages for each topic. Then I placed those pictures that I had found into the page and I typed in some description. Whereas for the video link page, I inserted the embed html into the code part and make it autoplay when user enter the site. I did the same thing for all of the topics. Below is one of the example of the the gallery and video links for one of the topic...
This is how the gallery page looks like.

This is how the video link page looks like.
After making sure that all the links work correctly, than my website is done. I felt happy with my work because I put a lot of effort in doing it and I enjoyed the process as well. Feels great to learn something new...
No comments:
Post a Comment